CDM 347
Lighting Techniques for Camera
Two Famous Horror Scenes and Analysis of Lighting

IT: Chapter One (2017)


Scream (1996)

These are the shots of the practical lighting in chronological order as she walks through her house.


Lighting Techniques for Camera
Recreating stills from movie scenes


Original
Recreation


Original
Recreation


Original
Recreation

Original
Recreation


Original
Recreation


Original
Recreation
Recreating Lighting Scenarios
Sat By An Open Fire

Police Chase

Lightning Storm

Moonlit Lake

Lighting Techniques for Camera
Lighting Diagrams & Still Frames For Horror Film Shoot
Downstairs Hallway

On set


Living Room


On set
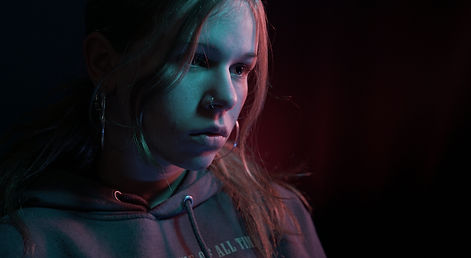
Calm Bedroom


On set


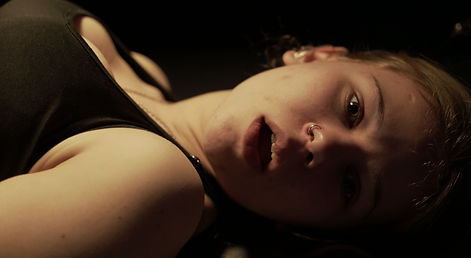
Baby Attack Bedroom
On set

Upstairs Hallway
On set


Finished horror film
Evaluation of Lighting on Horror Shoot
The downstairs hallway lighting was carefully considered, taking into account the room layout and desired camera angles. Instead of using floor lighting stands that would create visible differences between shots, overhead lights were chosen for a consistent and warm glow, maintaining a deceptively welcoming feel while not obstructing the shots.
In the future, I think that we are going to take the overhead lights into account in the lighting diagrams. They allowed us to take shots from a wider range of angles, without having to worry about changing the lighting in the shot by moving the lighting stand. It gave us peace of mind that the shots would be consistently lit throughout the scene which lessens the need for excess colour grading in post production. Therefore, when we perform a recce of the location next time, we will test to see if the overhead lights are suitable for the shoot by taking pictures with them on and assessing from there.
By making adjustments to the original lighting diagrams for the downstairs area we were able to enhance the creepy atmosphere almost unintentionally. Although we had planned the lighting to be positioned at the top of the stairs to look as if the landing lights were on, in reality this didn’t show up on camera at all. Finally, we found a better place for the light which cast a shadow on the wall by lighting the stairs from the side. We discovered that shining light through objects to create harsh shadows is an effective way to use hard lighting to emphasise a feeling. In our case, hard lighting was an improvement to the soft lighting from the top of the stairs that we had originally planned because it made the stairwell look more daunting and less comfortable. Additionally, we learned that open spaces like doorways to the next room are ideal places to put lighting stands as they don’t obstruct the camera operator. So, with future diagrams where we map out the layout of a room and plan the places that we want to put the lights, we will remember that open spaces don’t necessarily have to be limited to the room that you are shooting in.
Moving to the living room, challenges were faced due to the room's size and a large window behind the subject. To ensure complete darkness behind the subject, we planned to black out the windows with tin foil and a black cloth/curtain. Overhead lights were ignored as they were too bright, and the desired effect was achieved by having only white flickering light spill on the actress from the TV. We decided against placing a lamp on a side table and drew attention to the baby monitor, emphasising the notion of investigation.
After the struggle with blacking out the room on day one, I now understand that set preparation is much more important than just turning up on the day and expecting to be able to complete it quickly and without problems. Next time, I know that having a crew come the night before or early morning to dress the set before the crew arrives means that we won’t be eating into precious shooting time. Being efficient on set is a key skill that will really help in a professional setting where time is money.
In the calm bedroom scene, a cool blue panel light was positioned in front of a small window, creating the desired moonlight effect. A children's lamp was added to enhance the illusion of a normal child's room, although adjustments were made in the final design.
During the baby attack scene, the lighting remained almost identical to the calm scene to maintain continuity. However, attempts to introduce strobing lights for a freaky effect were quickly abandoned to avoid leaning too much toward paranormal activity. This is a good example of why it is important to have a clear idea of the way you want the lighting to look before you go for it on the day of the shoot. When we played around with strobing lights, we just wasted time and battery-life in the lights. I think this should have been something that we tested for effect in pre-production when we marked through the scene without our real actor.
For the upstairs hallway scenes, different lighting approaches were taken. In scene 6, a warm light was used to amplify the downstairs glow and create eerie shadows through the bannister slats. In scene 9, the light from the bathroom was utilised as an accent, illuminating the surroundings while emphasising the glow on Ellie's face. Making use of pre-installed lighting features around us in combination with lighting that we bring on set is my favourite way to light a scene. I’d like to carry it into further projects because I believe it makes the scene look more realistic.
Overall, the lighting setups demonstrated thoughtful consideration of the desired effects and mood for each scene. However, the thought could have been put in before the shoot to save time rather than in the moment despite creating interesting effects. Adjustments were made on set to ensure optimal results, while some changes were made in post-production to maintain consistency with the film's themes. The evaluation highlights the importance of assessing lighting through the camera lens to achieve the desired visual impact.